How to get on-model photos without a photoshoot
Start to finish: which source photo to use, what to direct, how to refine it turn by turn, what to check before publishing, and how it reaches the product page.
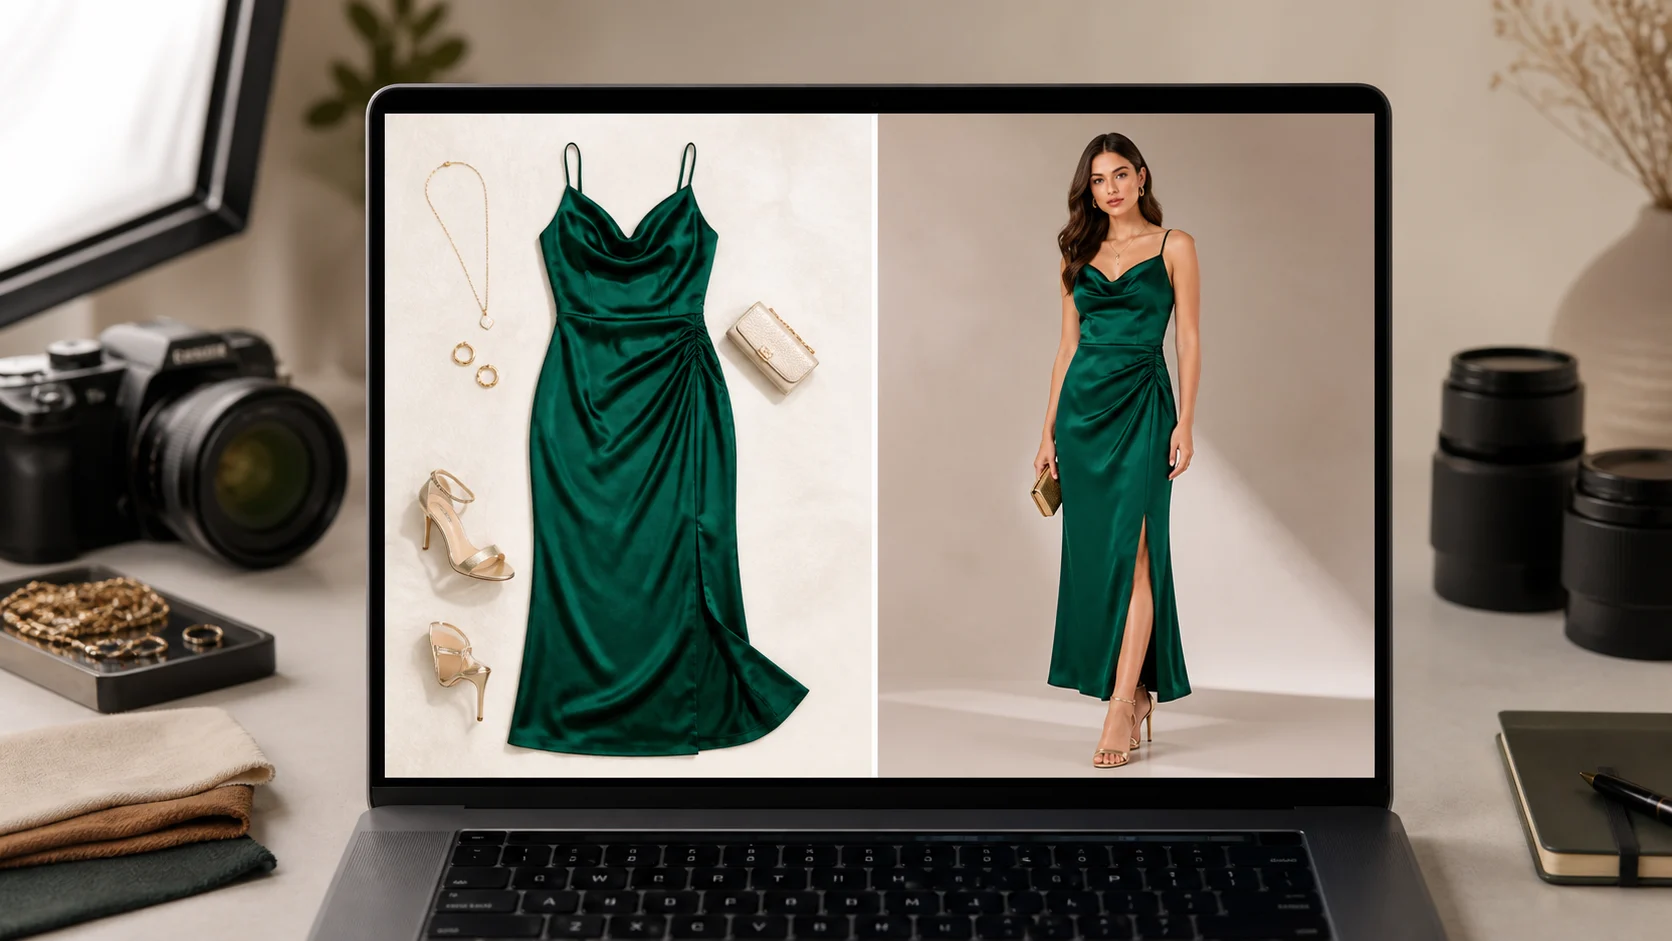
Start with the photo you already have
The input is a photograph of the garment on its own: a flat-lay, a hanger shot, a mannequin shot, or the supplier image already sitting in your admin. No new sample, no studio booking, no model call. What the generation needs from that file is the garment described completely — the whole piece in frame, in focus, the colour true, the hardware and the print legible.
Faults in the source travel forward. A warm bulb that pushed a stone grey towards beige, a shadow lying across a print, a hem folded under during styling: the on-model result inherits all three, because that photograph is the only evidence of the product it has. If you reshoot one image in this entire process, reshoot this one. It is the only photograph a person still has to take.
Choose the shoot type
There are three, and they are not interchangeable. On-model is apparel worn by a model, which is what most product pages are missing. Accessory is jewellery, eyewear and bags worn by a model, where the piece stays the subject and the body is really a mount — a pendant photographed on a collarbone reads at a size a flat-lay never gives it. Product Scene is a styled shot with no model at all: the product on a surface, in a set, lit deliberately.
Pick before you direct anything else, because the controls that follow change with the type. If you are working out which of these a given product page needs, the full image mix is a separate question.
The art direction, in the order that matters
Model first. There is a roster of 50+ models to choose from, or you can bring your own if a particular face already runs across the brand. Then skin tone, from Fair to Deep, then expression and hair. They set the tone of everything after, which is why they come before lighting.
Scene next: studio, city street, garden, living room, golden-hour, or a location you upload yourself. Lighting is separate from scene, running from soft daylight and golden hour through softbox, hard flash, moody and neon, and it is the control that does most of the work on fabric. Softbox flatters structure and seams. Hard flash finds texture and shows every crease. Mood is the last of the tonal choices: editorial, minimal luxury, high fashion, vintage.
Pose is where the product information lives, and you pick up to 6 from a nine-shot list: front, back, three-quarter, profile, walking, seated, leaning, hands on hips and over shoulder. Choose them against the garment rather than by habit. A tie-back dress needs the back or the page is hiding its best feature. A pleated skirt needs walking, because a pleat that never opens is just a printed line. A tailored coat needs three-quarter, the one angle where the shoulder and the lapel are both readable.
Framing closes it out — Auto, which is full body, or Waist-up — with the aspect ratio set per run: 4:5 by default, or 1:1, 3:4 or 9:16.
The first pass
An image takes about 6 seconds. Use that. Generate a spread — 3 or 4 poses of the same look — instead of pushing a single frame towards perfect, because you will judge a set faster than you can imagine any single shot.
A generation that fails costs nothing. The credit is reserved when the job starts and released if the job fails, errors, or is rejected before delivery, so a bad run is a bad run rather than a bad run you paid for.
Refine it turn by turn
The editing is conversational, in plain language, the way you would talk to a photographer on set. The product stays consistent across the turns, so you are adjusting the picture rather than rolling the dice on a new garment. A real chain looks like this: "close up on the neck, one hand touching the necklace" → "don't cut her face, pull back a bit" → "warmer light, hair up."
Two things worth knowing before you fall into the habit. Each send costs 1 credit, so an image you talked through 4 turns cost 5 credits, which adds up quietly across a catalogue; the arithmetic is worked through here. And you can branch from any earlier turn — if the fifth instruction takes the frame somewhere you do not want, go back to the second and take a different line from there rather than starting the shoot again.
The pass before anything goes live
Open the source and the result at full size, side by side. Thumbnails hide exactly the things you are looking for.
Work through it in a fixed order: colour against the source, hem length, neckline, sleeve length, the number and position of buttons, print placement across a seam, hardware, lace, and how the closure sits at the back. The failure mode to watch for is invention — an extra button, a pocket the garment does not have, a print that continues politely across a seam it does not match on the real thing. An invented detail is a different product, and a product page showing a different product is a problem no caption solves later.
If something is wrong, that is a refinement turn, not a rejected image. Say what is wrong and regenerate from the turn before it.
One look, several ratios
The product page usually wants 4:5. The collection grid wants 1:1. A story or a reel wants 9:16. Generate each ratio rather than cropping down from one master file, because a 4:5 cropped to 9:16 loses the shoes and frequently the hem, which is the part you generated an on-model image to show in the first place.
Save the Look, then publish
Once a configuration produces something you would put your name on, save it as a Look. The next 40 products in that range then come back looking related instead of looking like 40 separate decisions, which is the difference between a catalogue and a folder of images.
Results land in the Gallery. From there you download them, or publish straight to a Shopify product or variant — one click on Shopify, and a download for any other storefront. Publishing to the variant rather than the product is the detail most people miss: the shopper switching from black to sage should see the sage image, not the black one with a swatch under it.
If your starting point is a catalogue of flat-lays, the flat-lay to on-model use case walks the same route with the specific problems that input creates, and the reason flat-lays leave gaps at all is worth reading before you decide how many products to convert.
FAQ
What kind of source photo works best?
The cleanest, most complete photograph of the garment you own — flat-lay, hanger or mannequin. It should show the whole piece in frame, in focus, with the colour accurate and details like hardware, lace and print placement legible. Everything the model photo knows about your product comes from that one file, so a soft or colour-cast source produces a soft or colour-cast result no amount of refinement fully recovers.
Do I need a photographer at any point?
For the source photograph, yes, or at least someone with a phone, a window and a clean surface. After that the models, the studio, the lighting and the styling are all choices inside the app rather than bookings in a diary. The people work goes into the one image at the start instead of into a day.
How many credits does a finished image actually cost?
One image is 1 credit, and each conversational refinement is another. An image approved on the first pass costs 1. An image you adjusted across 3 turns costs 4. Generations that fail are released and cost nothing. The practical implication is to get the art direction close before you start talking, then refine the few frames that are worth it.
Can I keep the same model across a whole collection?
Yes, and that is what saved Looks are for. A Look stores the shoot configuration — model, skin tone, scene, lighting, mood, framing — so every product you run through it comes back with the same person in the same room under the same light. You can also bring your own model if a face already appears across your brand and you need the catalogue to match it.